Doi were Japanese manufacturers of photography accessories who were around in the 70s and early 80s.
The Auto Circle Flash was one of their range and quite a decent bit of kit, like other items in their portfolio.
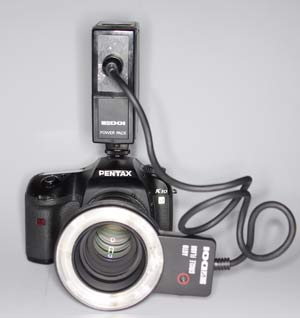
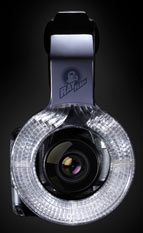
Weighing just 120g, the ring flash head is lighter than the Centon / Vivitar 5000 style model because the batteries are housed in a separate pack that slides onto the hot shoe. The ring flash then connects to the battery pack with a seven pin din cord and is mounted on the lens using a Series VII adaptor ring. The diameter of the inner hole is 50mm so it’s best suited to longer lenses or ones with a filter thread of 49mm or 52mm otherwise you may get vignetting. The manual indicates it’s fine for use with lenses up to 58mm filter thread.
The power pack takes four AA batteries which means it’s more costly to run than a Vivitar 5000 and there’s an socket for a DC 6v mains power supply. This power adaptor was sold as an optional accessory. Having 6v power means it enjoys a more meaty output with a decent guide number of 26. That’s as much as you need for macro, but also means it’s quite useful for portraiture.
It has a single pin in the centre of the shoe that allows the camera to trigger the flash – there’s no form of dedication. The pack rotates on the shoe bracket allowing a swing of 90 degrees in either direction.
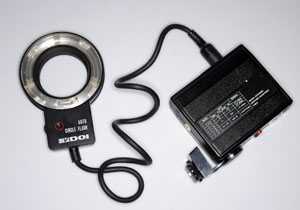
The rear plate has the on/off switch and a ready late that glows orange. There’s an exposure table on one side panel and a macro exposure table on the other, so you don’t need to refer to your manual when using this.
There’s also a 2.5mm jack to connect a PC flash cable and a test button housed on the hot shoe bracket.
The size of the power pack, excluding the shoe, is 80x97x39mm, and it weighs 205g without batteries.
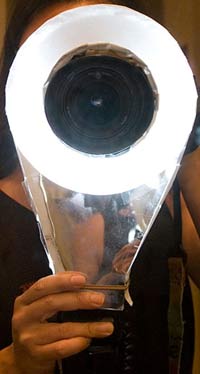
As the ring flash head is light it adds no real strain on the filter mount so focusing isn’t affected. It has a power light and a sensor. The sensor cuts the output so correct exposure is delivered at two aperture settings marked blue and red. On the exposure scale this indicates f/16 on red and f/8 on blue when the CCD or film sensitivity of ISO100 is used. This makes it much more powerful than the Vivitar / Centon style, but also it can be a touch restrictive if you’re trying to shoot with a wide aperture for minimal depth of-field. In the film days you could have opted for ISO25 film to get an f/4 aperture on the blue setting, but currently that’s not possible with digital.

One other neat feature is a focusing lamp which can be used to provide light to help you focus in low light. It’s especially useful when using manual equipment where the lens is already stopped down when you’re focusing or when you work in low light or at extreme bellows extension. The light does take it out of the batteries though, so should be used infrequently.
The flash head dimensions are approx 87x125x25mm.
The unit was supplied in a hard case with a divider to separate the flash and the power pack. The pack can be left in the case and the ring flash head conveniently connected via a hole in the side.

The colour temperature of the tube is quoted as 5600k. We found the output a shade bluer than the Vivitar unit when compared side by side, but this is easily corrected if you’re shooting in digitally or with an 81 series warm filter when shooting using film.


 Flaghead Photographic announce the availability of the long awaited Rayflash Ringflash Adapter for the Nikon SB900.
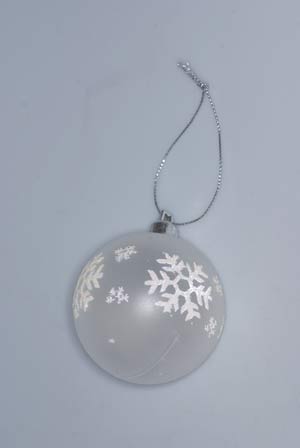
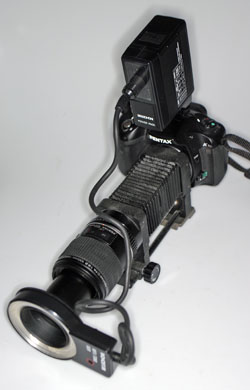 Small ring flash units are ideal for macro, especially when using bellows as it’s the most effective way to get light onto tiny subjects. Another way is to mount flashguns on brackets at either side but this makes the rig more cumbersome and sometimes not flexible enough when shooting subjects in tight spaces. The smaller the ring unit the better. The vintage Doi (reviewed here:
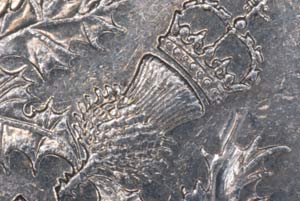
 We just stumbled on this – a link to another DIY ringflash project from Tommy Huynh on his web site – the Ferel Photographer. This one looks quite good and could be made on a budget to fit any flash gun you care to use.